Storing your Bitcoin securely for the long term is one of the most essential steps for every Bitcoin investor. A hardware wallet offers the highest security standard and protects your Bitcoin from unauthorized access. The good news: You can easily connect your hardware wallet to the Relai Web App and combine the advantages of both worlds.
In this article, we’ll show you exactly how this works.
What Is A Hardware Wallet And Why Is It Important?
A hardware wallet is a physical device designed to securely store your Bitcoin.
Unlike software wallets installed on your computer or smartphone, a hardware wallet stores your private keys offline, protecting them from online threats.
The advantages of a hardware wallet are numerous:
- Maximum security: Your private keys never leave the device
- Protection from malware and hacking attempts: Since the wallet is offline, it cannot be attacked via the internet
- Easy recovery: In case of loss, you can restore your wallet with your seed phrase
- Long-term storage: Ideal for securely HODLing your Bitcoin over many years
The most popular hardware wallets include BitBox, Ledger, and Trezor. With the Relai Web App, you can connect your hardware wallet and benefit from its user-friendliness while your Bitcoin remains secure on your hardware wallet.
Preparation: What You Should Know
Before connecting your hardware wallet to the Relai Web App, you should consider the following:
- Make sure your hardware wallet is properly set up
- Store your backup phrase in a secure location
- Update the firmware of your hardware wallet to the latest version
- Ensure you have access to the Relai Web App
Relai supports various hardware wallets, including the BitBox02, Ledger, and Trezor. Below, we’ll show you how to connect your hardware wallet to the Relai Web App step by step.
Step-By-Step Guide: Connecting Your Hardware Wallet
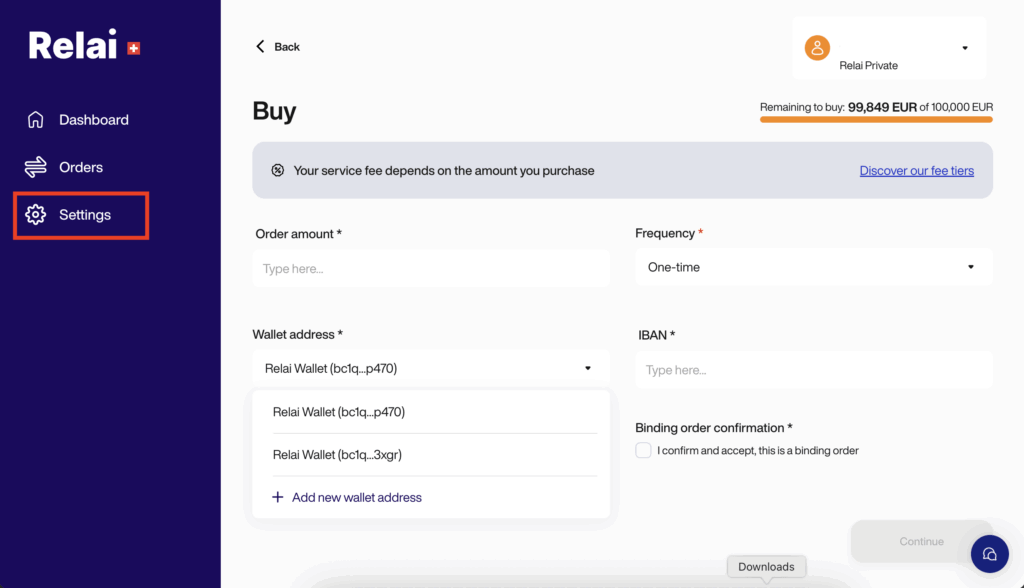
1. Open Settings
First, log in to the Relai Web App and click on “Settings”. Here you’ll find various configuration options for your Relai account.
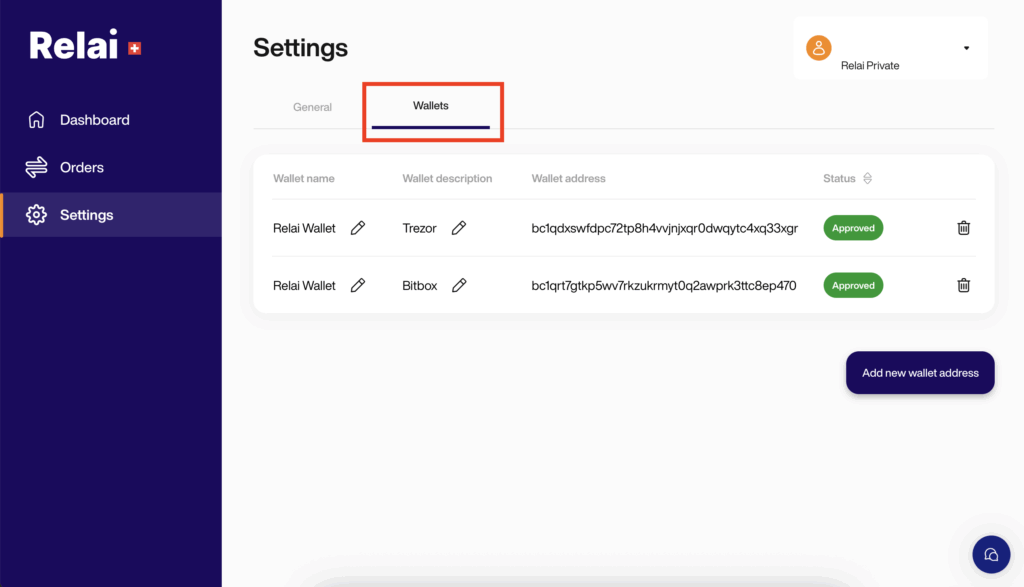
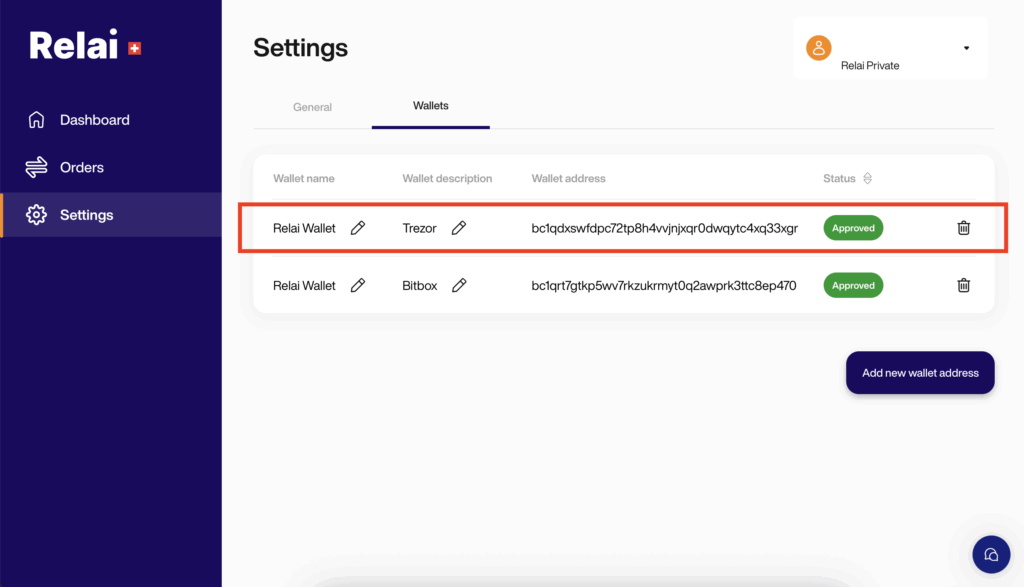
2. Navigate To “Wallets”
In the Settings menu, click on “Wallets“. Here you’ll see all your already connected wallets and have the option to add a new wallet.
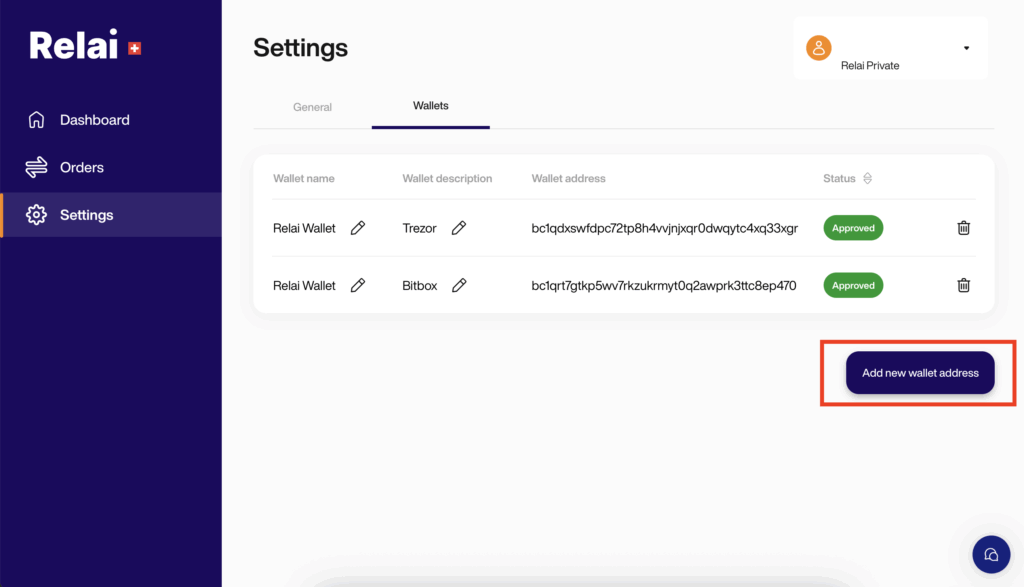
3. Add New Wallet Address
Click on the “Add new wallet address” button. A new window will open showing various options.
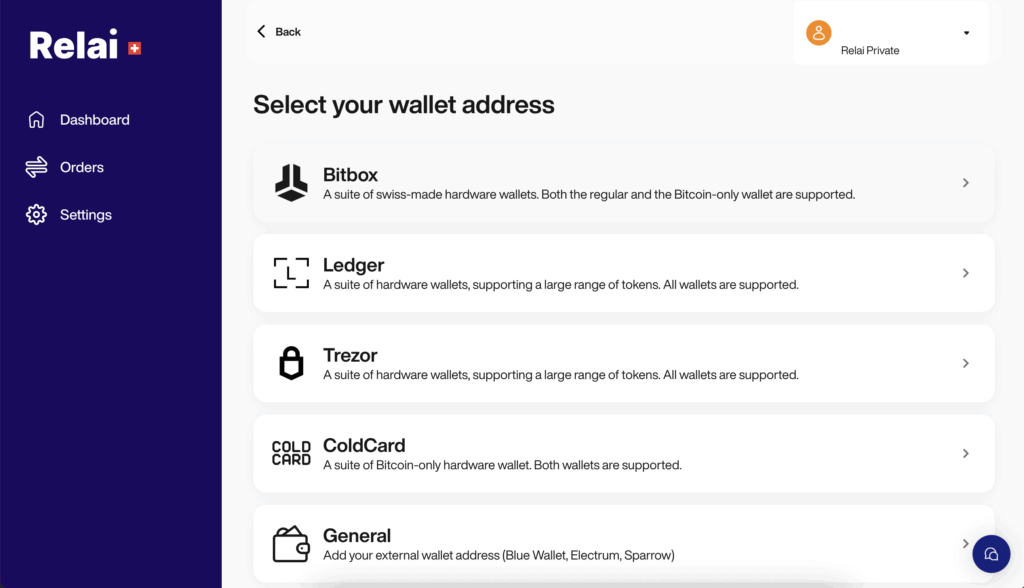
4. Select Hardware Wallet And Sign Message
Choose your hardware wallet brand from the list. Depending on the model, you’ll be shown how to sign a message with your hardware wallet. This step is essential to verify that you are the owner of the hardware wallet.
Connect your hardware wallet to your computer and follow the on-screen instructions. You’ll be prompted to sign a specific message, which must be confirmed directly on your hardware wallet.
5. Name And Manage Wallet
After the signature has been successfully verified, your hardware wallet will appear in the list of connected addresses. You can now give it a name and description to make it easier to find later.
You can send Bitcoin directly to your hardware wallet when you buy Bitcoin with the Relai App. Your coins will no longer be stored in the Relai App itself but will be sent directly to your secure hardware wallet address.
Specific Instructions For BitBox02
The BitBox02 is one of the most popular hardware wallets and is particularly easy to connect to the Relai Web App. Here are the specific steps:
- Connect your BitBox02 to your computer
- Unlock the BitBox02 with your password
- Select “BitBox02” as your hardware wallet in the Relai Web App
- Follow the instructions for signing the message
- Confirm the signature on your BitBox02 by touching the sensor surface
For a visual guide, you can also watch the video tutorial at the following link: BitBox02 Tutorial
Security Tips For Your Hardware Wallet
Once you’ve connected your hardware wallet to the Relai Web App, you should follow these security tips:
- Store your backup phrase in a secure location: Ideally stamped on metal and kept in a secure place.
- Regularly update the firmware: Always keep your hardware wallet up to date.
- Always use the official website: Only download software from the manufacturer’s official website.
- Verify the recipient address: Always check the recipient address on your hardware wallet display before sending.
- Buy only from the manufacturer: Purchase your hardware wallet directly from the manufacturer or authorized dealers, never second-hand.
Conclusion
Connecting your hardware wallet to the Relai Web App is essential in storing your Bitcoin securely in the long term. With this combination, you benefit from the Relai App’s user-friendliness and a hardware wallet’s maximum security.
If you don’t yet own a hardware wallet, you should consider investing in this important security aspect. The cost of a hardware wallet is negligible compared to the potential loss of your Bitcoin.
With Relai and a hardware wallet, you’re perfectly equipped to HODL your Bitcoin and benefit from long-term appreciation securely.
FAQs
Can I connect multiple hardware wallets to the Relai Web App?
Yes, you can connect multiple hardware wallets to the Relai Web App. Each wallet will be displayed in the list of connected addresses and can be individually named.
What happens if I lose my hardware wallet?
If you lose your hardware wallet, you can restore it with your new device’s backup phrase (seed phrase). All your Bitcoins will remain safe.
Can I send Bitcoin directly from Relai to my hardware wallet?
Yes, after connecting your hardware wallet to the Relai Web App, you can select the hardware wallet as the recipient address for each Bitcoin purchase.
Does Relai also support the Lightning Network with hardware wallets?
Support for the Lightning Network with hardware wallets depends on the particular model. Check with your hardware wallet manufacturer for Lightning compatibility.
How secure is the connection between the Relai Web App and my hardware wallet?
The connection is secure because your private keys remain on the hardware wallet and are never transferred to the Relai Web App. Transaction signing always takes place directly on the hardware wallet.
Disclaimer: Relai services are exclusively recommended for residents of Switzerland and Italy. None of this content constitutes financial advice. Always conduct your own research before investing in digital assets.